SAGE ACCOUNTING
Get Started
with Sage Accounting
This learning page will help you get up to speed with your Sage Accounting program in no time. To go further, view our Daily Transactions with Sage Accounting page.

Create an Account
You can get full access to Sage Accounting, upgrade or cancel at any time. No long- term contracts, commitments, or hidden fees. Ready to sign up? Watch the video to find out how.

Migrating from Sage 50
Getting ready to migrate from Sage 50 to Sage Accounting? These three videos will guide you through the seamless process. If you are starting, these steps are not needed.
Preparation
Migrating Data
Importing
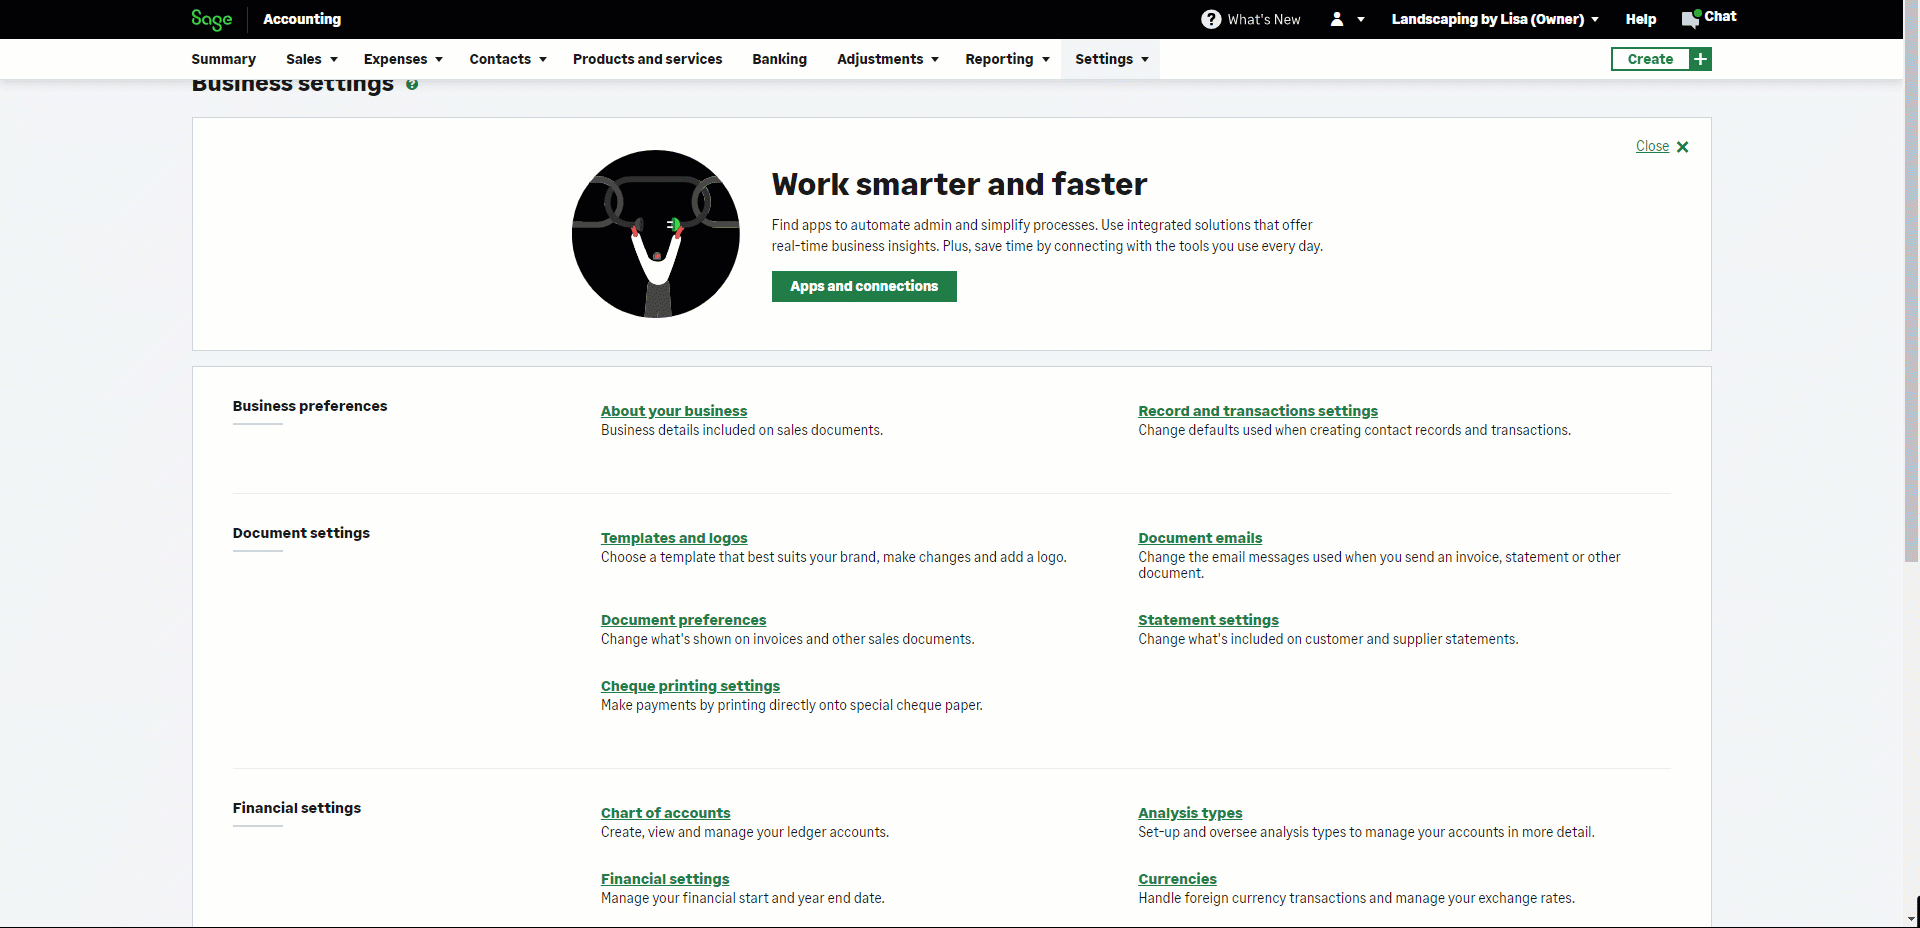
Review and Update Business Settings
Review or modify all your business settings for Sage Accounting on your Business Settings page. Here you can alter your business preferences, document settings, financial settings, customize accounting, and enter opening balances for the customer, bank, vendor, or general ledger.

Customize Invoices
Add a company logo to your documents and select any available template layout.
First, click Settings, then click Templates and Logos.
Edit the way your invoices look and add your logo, then click Save.
Next, On the Settings menu, click Document Preferences.
Finally, Review and edit the information that appears on your invoices, then click Save.
Review Default Settings
Within your Business Settings page, you can change the defaults used when creating contact records and transactions in Sage Accounting. These settings are under Record and transaction settings. You can set defaults for your sales to customers. You can also set defaults for your purchases from vendors, payments & receipts, products & services, and accounting settings. Note: These defaults can be overridden on individual sales if you like.

Review Chart of Accounts
Within your Business Settings page, you will a find a subsection called Chart of Accounts under your Financial Settings section. Here you can create, view, and manage your ledger accounts. If you need to edit a ledger account, you can click on the account to make your modifications. You can also import your chart of accounts. Note: Only import your chart of accounts if you have not created any transactions or records within Accounting. Also, your import file overrides all current accounts. This may be a fast option to enter your correct chart of accounts into Sage Accounting.
Enter Opening Balances
Opening balances represent the financial position of your company on the day before you start using Sage Accounting. You can enter opening balances for: Outstanding customer transactions, Outstanding vendor transactions, Bank account balances, General ledger trial balance values.
Enter your opening balances by following these steps:
- Under Opening Balances, click General Ledger.
- Verify that the date is correct.
- Enter a reference for your opening balances.
- Enter the remainder of your trial balance as follows:
- a. Ledger Account. Select the account for which you are entering an opening balance.
- b. Details. Enter additional details as needed.
- c. Debit. If the trial balance shows a debit value, enter it here.
- d. Credit. If the trial balance shows a credit balance, enter it here.
- Repeat these steps until you have entered all values from your trial balance.
- Verify that the opening balances entered match those on your trial balance. to finalize your journal entry.
- Click Save.
Set up items, customers and vendors
If you will be tracking items, customers, and vendors in Sage Accounting, follow these steps to get started.
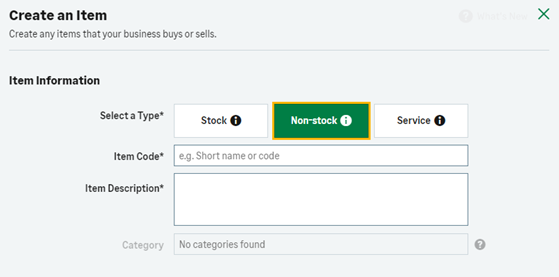
Enter a new item by following these steps:
- Click
 from the menu bar.
 - Click
 .
. - Complete a section.
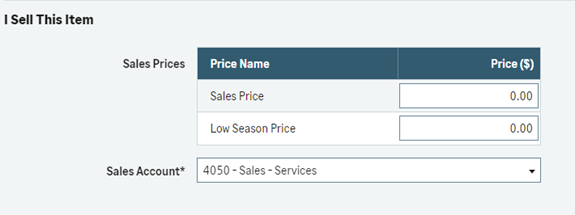
- Enter the price of the items that you sell in the “I Sell This Item” section. Make sure to select the correct sales account.
- If the row is for a credit value, enter the value here and leave the debit as 0.00.
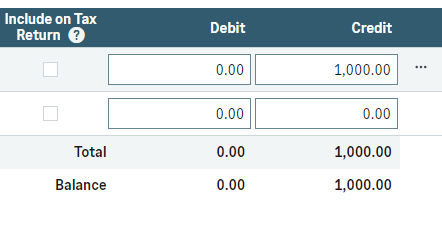
- Click
 to finalize your journal entry.
Enter a new customer by following these steps:
- Under
 from the menu bar
  .
. - Then select
 .
. - Complete the Create a new customer screen.
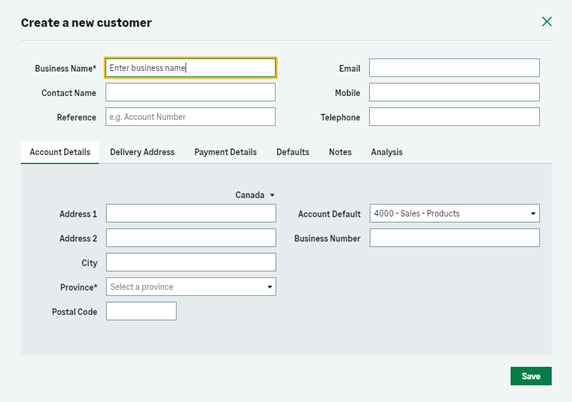
- Then click, .
Enter a new customer by following these steps:
- Under from the menu bar
 .
. - Then select
 .
. - Complete the Create a new customer screen.
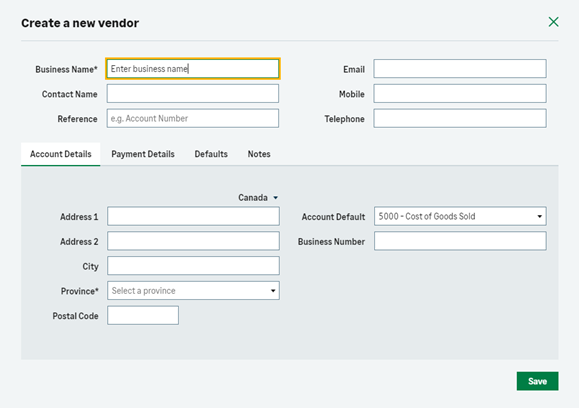
- Then click, .
Ready to go further?
View our Daily Transactions with Sage Accounting page.
Need training? Have questions? Want guidance? We’re here to help.
Inquire
Join industry peers, certified partners, and Sage pros online 24/7 in the Community Hub – the best place to ask questions and share product experiences, tips, and tricks.
Inquire
Join industry peers, certified partners, and Sage pros online 24/7 in the Community Hub – the best place to ask questions and share product experiences, tips, and tricks.
Inquire
Join industry peers, certified partners, and Sage pros online 24/7 in the Community Hub – the best place to ask questions and share product experiences, tips, and tricks.